Nanette Conrey
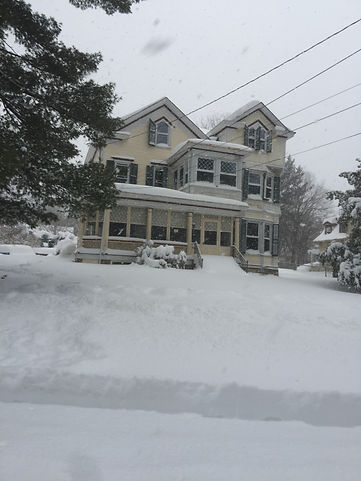

Scott and I have been renovating our 1876 home since we purchased it in 2008, starting with all new electric and a new roof. Most of the renovations have been conducted by Scott and I with much help from our friends.
In 2012, I took a sabbatical from work to advance the renovations focusing on demolishing the plaster walls, upgrading steam heat system, framing the attic bathroom and utility room, as well as structural modifications to open up the main floor and address the buckling beams in the basement.
Since I went back to work in 2013 we have completed the structural upgrades, installed 2 new staircases, finished the plumbing and electric, framed out the walls and installed drywall in the attic and second floor, finished the second floor bathroom, and installed interior doors.
The following provides some highlights of the work performed during my sabbatical and beyond:
Structural Modifcations
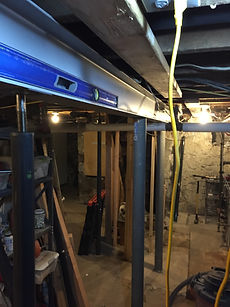
Scott and I designed, permitted, and installed the structural I-beams. Great fun!


Above Left: I-beam in basement running length of house.
Above Center: Staging first floor I-beams to go through the window.
Above Right: Inside view as the I-beams were brought into the house.
Left: Connection of the two main floor I-beams. Illustrates LVL's used to replace damaged floor joist.
Right: Jacking up one of the first floor I-beams. The chimney was eventually removed and the bricks are being used as part of the landscaping design.
Bottom Left: I-beams are installed and second floor joist attached.
Bottom Right: First floor column I-beams connection to I-beam in basement.


Four I-beams were installed, two in the basement and two on the main floor. The purpose of these installs was to address buckling structural beams in the basement and remove the structural walls to open up the main floor. Six footers were installed in the basement to transfer the loads from the outer walls and stone foundation.
Yes, I dug out the footers, hauling the dirt and stone out of the basement a bucket at a time - slow, hard work, but very rewarding. Scott and I poured the concrete using a friends electric mixer, 4500 psi strength concrete, and steel rebar. The concrete cured for 60 days before installing the beams and applying a load. We were able to install the I-beams ourselves using ingenuity to position and hoist the 300 plus pound beams. It is all about having the right tools.
Twenty-seven (27) tons of plaster and debris were removed from the house to allow for installation of Roxul Insulation in exterior walls. We also installed the insulation in the bedrooms' interior walls and floors/ceilings. Roxul provides thermal insulation, as well as noise and fire resistant barriers.
Steam Heating System Upgrade
The black pipe was replaced and reconfigured to simplify the pipe runs and ensure that the correct slopes were achieved maximizing system performance.
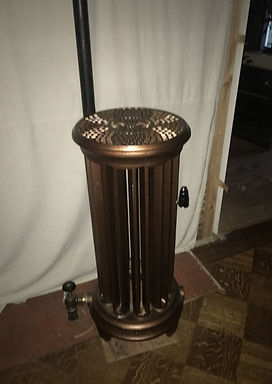
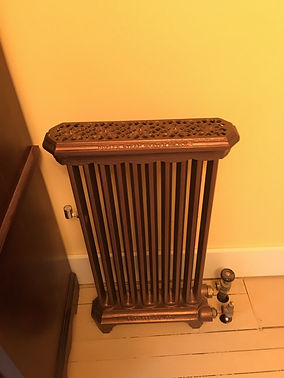
We contracted locally to have the radiators sandblasted and primed, and then I did the rest using my trusty spray painter. The radiators are now displayed as an architectural feature throughout the house.
Not only are the radiators a beautiful feature, they keep the house warm throughout. Combined with the new insulation, the cold drafts so common to an old house have disappeared and the utility bill has noticeably diminished. Win-Win!
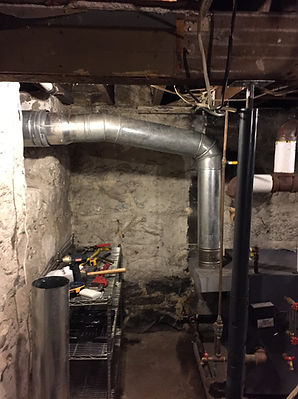
After removing the internal chimney, the boiler vent was redirected outside through the old coal shoot and then routed above the roofline (see below). We miscalculated when sizing the chimney and eventually had to install a draft inducer (not shown) to ensure the boiler would exhaust outside. I appreciate the error because now the draft inducer provides one more safeguard preventing CO buildup inside the house.
We have installed CO/smoke detectors using a Nest Network system another layer of protection. With the original boiler manual, Scott and I are able to conduct all repairs and maintenance on the system.


The Attic

When we first purchased the home, the attic was only good for storage, but it was the reason we bought the house. It had a small room that was used by the maid/cook during the home's early history. The sky was visible from many points in the roof. The sub-floor was loose and dangerous to walk on, there was a cistern and two chimneys that took up a lot of space, the roof structure was compromised when the chimney was installed, and the stairs to the attic were steep and narrow making them basically unusable.
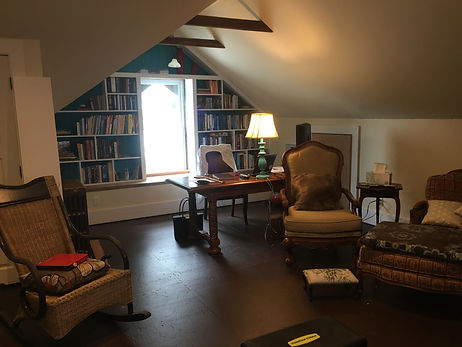
Now the attic is an open room with loads of storage. We are using it as an office, gym and TV room. The central AC air handler is housed in the new utility room and AC ducts are housed behind knee walls and under benches. We used every inch of the attic to create a flexible comfortable space.
The pictures below show the attic rebuild in process. Roof joist were sistered with 2X10's and then Roxull insulation was installed along with baffles to allow for air flow. The roof was structurally reconfigured to open up the room. A new electrical sub-panel was installed in the utility room.

Left and Below - Before and after photos of the attic space.
We sistered LVL's to floor joist and installed two layers of sub-floor to stiffen structure. Bookshelfs and storage were added, and we boxed out the AC duct that feeds attic and second floor.
The complicated roofline adds interesting features. We used original studs as cross braces to add architectural interest as well as stiffening the structure.


Above and Right - Before and After of the back of house. Bathroom was added behind the wood paneled wall along with a closet and extra storage behind knee wall that was installed to house the AC duct.
Below - Before and after includes 15-foot cedar lined closet, and recycled studs used as cross bracing.


Recyling Materials
We have tried to reuse as much of the materials as possible to include sub-floors, studs, joists, doors, and brick. Some materials we can just install without finishing, and others we paint or stain to bring out the luster of the wood.
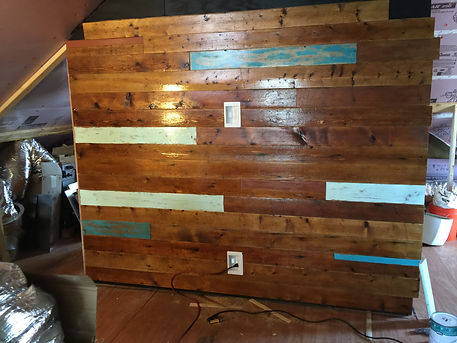

Above -Wall clad with original tongue and goove sub-floor from attic, painted blue and installed vertically as part of the bookshelf.
Left - Original attic sub-floor installed on TV wall, boards were sanded and then coated with clear poly finish. Some boards were painted and then distressed to add drama.
Right - Floor joist were used to frame the mirror that used to hang in the living room to cover the crumbling plaster. You can see the saw marks and the holes drilled in joist to install the knob and tube service.
Right - the closet door was originally used as the exterior door to the second floor patio located on top of the front porch. Replacing this door with an exterior door was one of the first projects Scott and I tackled. It eliminated the cold draft (wind gusts) in the upstairs hall. I refinished the door over several weekends, stripping old paint before applying a fresh coat to match the rest of the interior doors.
Bottom Left Corner - The repurposed, repainted radiator that warms the master bedroom.
